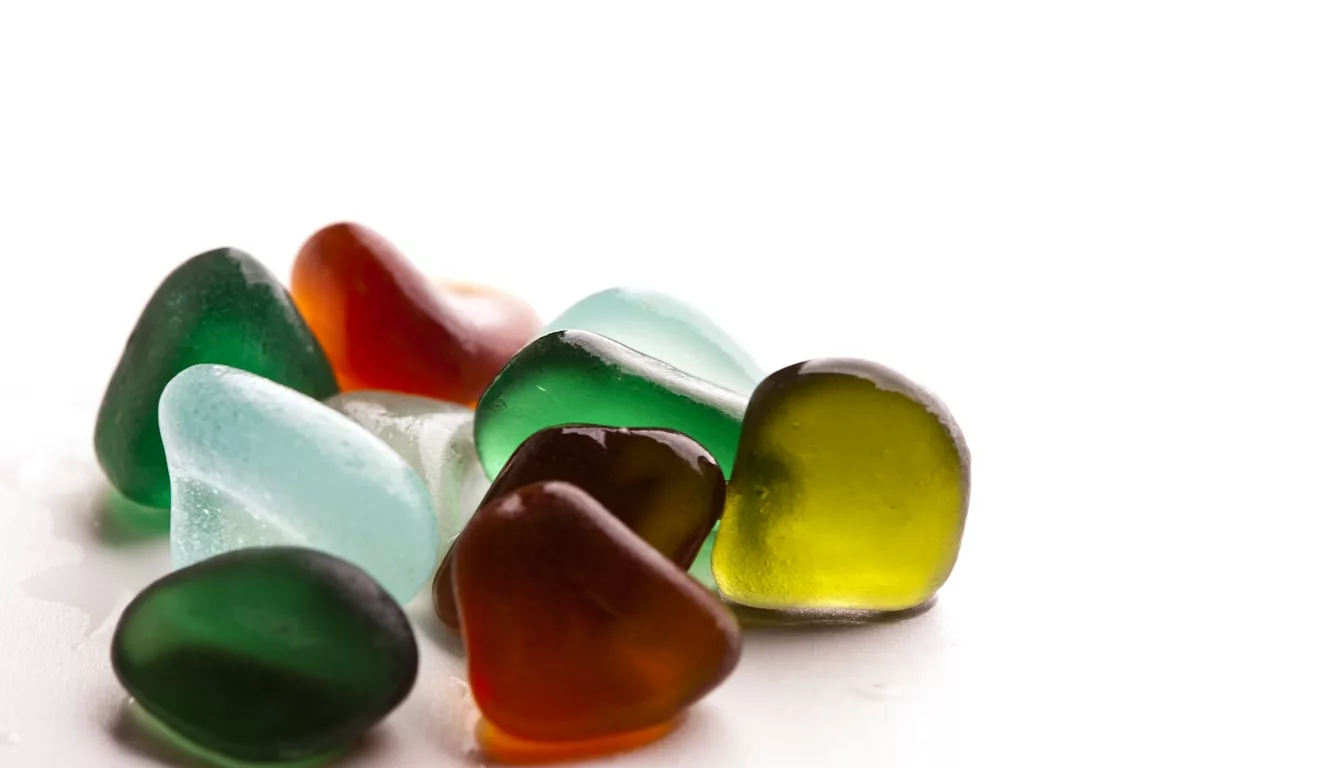
The best part of a sea glass collecting trip with kids isn't finding the glass - it's what happens next. That little pile of frosted green and white pieces sitting in a bowl on the kitchen counter doesn't have to just sit there. Sea glass is one of the most versatile natural craft materials out there: it's smooth, colorful, comes in natural shapes, and carries a story about where it came from.
These projects are designed with real kids in mind - not the Pinterest version of kids who sit quietly for two hours. Most take 20-45 minutes, use materials you probably have at home, and produce something kids will actually want to keep or give as a gift. A few require adult help for hot glue or wire steps, but the kids do the real work.
Before you start, rinse your sea glass in fresh water and let it dry completely. Glue bonds much better to clean, dry glass.
1. Sun Catcher - No Glue Required
Age range: 3 and up
Materials: Contact paper (clear, adhesive on one side), sea glass, a stick or wooden dowel, string
Time: 20 minutes
This is the entry-level sea glass craft - no glue, no mess, completely safe for younger kids. Cut two equal rectangles of contact paper. Peel the backing off one piece and lay it sticky-side up on the table. Let the kids arrange sea glass pieces on the sticky surface however they like - random is fine, and so is deliberate patterns. Press the second piece of contact paper on top, sticky sides together, sandwiching the glass. Trim around the edges if needed, punch a hole at the top, and hang it in a sunny window with string.
The glass glows when light hits it. Greens and blues in particular catch the light beautifully. This project is almost impossible to mess up, which makes it ideal for the youngest crafters. You can make several in an afternoon and hang a collection together.
2. Mosaic Art on Canvas
Age range: 5 and up
Materials: Small canvas or thick cardboard, craft glue (E6000 or similar), sea glass, acrylic paint
Time: 45 minutes + drying time
Paint the canvas a solid background color first - dark colors (navy, forest green, black) make sea glass pop more than light backgrounds. Let it dry. Then have kids arrange their sea glass pieces on the canvas before committing to glue - this is important because once pieces are down they're hard to move. When the design looks right, glue pieces one at a time.
Older kids can plan a scene: a wave using blue and green pieces, a sun using yellow and amber, silhouetted rocks using dark pieces. Younger kids tend to go abstract, which often produces more striking results anyway. Let the finished piece dry flat for a few hours before hanging.
3. Sensory Jar (Ocean in a Bottle)
Age range: 4 and up
Materials: Clear jar or bottle with tight lid, sea glass, sand, small shells, water, a few drops of blue food coloring
Time: 15 minutes
Layer sand, sea glass, and shells in a clear jar. Fill with water tinted blue or teal with food coloring. Seal tightly with a lid (add a ring of glue around the inside of the lid if you don't want it opening accidentally). When you tip the jar sideways and back, the sea glass tumbles through the blue water like it's being turned by a wave.
These make great bedside decorations for kids who love the ocean - it's calming to tip and watch. You can use a mason jar, a clear plastic water bottle, or any clear container with a secure lid. Mineral baby oil mixed with water (roughly half and half) slows the settling time if you want a slower, more hypnotic effect.
4. Sea Glass Garden Markers
Age range: 6 and up (with help)
Materials: Large flat sea glass pieces, oil-based paint pens, clear nail polish or resin coating
Time: 30 minutes + drying
Flat, larger pieces of sea glass (the kind that are almost disc-shaped) work best. Kids write the names of plants or herbs on each piece using oil-based paint pens, which bond well to glass. Let them dry, then seal with a coat of clear nail polish or clear acrylic sealant so the writing stays on outdoors.
Push them into garden beds next to the plants they label. The frosted glass catches light in the garden, and they look genuinely nice - not like kids' craft projects that get tucked away after a week. If you grow herbs in pots indoors, smaller pieces work for those too.
5. Sea Glass Wind Chime
Age range: 7 and up (with adult help for drilling)
Materials: Driftwood or a wooden dowel, thin wire or fishing line, sea glass with holes drilled through (or use a diamond-tip drill bit), additional shells and beach finds
Time: 1 hour
This one requires a drill step - a diamond-tip drill bit designed for glass ($10-15 at hardware stores) makes clean holes through sea glass when used slowly with water as a lubricant. The drilling is an adult job, but everything else kids can handle.
Once pieces are drilled, kids thread them onto fishing line or thin wire in any combination - mix glass with shells, smooth pebbles, or wooden beads. Tie each strand to a piece of driftwood at varying lengths. The natural shapes and weights of the glass make each chime unique and produce a soft, clicking sound in the wind rather than the harsh clanging of metal chimes.
Driftwood found on the beach works great as the top bar - it ties the whole thing back to the original collecting trip.
6. Stepping Stone Inlay (With Adult Help)
Age range: 8 and up
Materials: Quick-set concrete mix, a round mold (a pie tin works), sea glass, rubber gloves
Time: 1 hour active, 24 hours curing
Mix quick-set concrete and pour it into a circular mold (a pie tin, a pizza pan, or a dedicated stepping stone mold sold at craft stores). Let it set for about 20-30 minutes until it's firm but still workable. Then press sea glass pieces into the surface in whatever pattern the kids want - spirals, waves, their initials, random arrangements. Press pieces gently so they're flush with the surface, not sticking way up.
Let cure completely according to the concrete mix instructions - usually 24 hours. Pop it out of the mold and set in the garden. These are genuinely lovely in garden paths and hold up to weather. Using pieces from a specific beach trip makes them meaningful - a memory built into something permanent.
7. Treasure Box Decoration
Age range: 5 and up
Materials: A small wooden box (craft stores, thrift stores), E6000 or hot glue, sea glass, paint
Time: 45 minutes + drying
Paint a small wooden box in a ocean color - dark teal, navy, or weathered gray. Once dry, glue sea glass pieces to the lid in a design. This could be a simple scattered pattern, a wave shape, or initials. Kids can also mix in small shells, beach pebbles, and other finds from the same trip.
The finished box becomes a place to keep future sea glass finds - the act of making it gives a purpose to the collection. It also makes a genuinely nice gift. A personalized sea glass treasure box from a grandchild is something grandparents actually keep.
8. Sea Glass Picture Frame
Age range: 6 and up
Materials: Plain wooden picture frame, E6000 or hot glue, sea glass
Time: 30 minutes + drying
Plain wooden frames from dollar stores or craft stores are perfect for this. Cover the flat face of the frame with sea glass, working around all four sides. Use pieces of similar size for a cleaner look, or deliberately mix big and small for a more organic feel. Let it dry completely (at least an hour with E6000) before inserting a photo.
A photo from the actual collecting trip - kids on the beach, the water, the haul of glass at the end of the day - displayed in a frame made from that same glass creates a complete memory. These are the kind of things that end up on a desk for years.
9. Sea Glass Terrarium or Fairy Garden
Age range: 5 and up
Materials: Clear glass bowl or vase, sand, small plants or succulents, sea glass, tiny figurines (optional)
Time: 30 minutes
Layer sand or small pebbles at the bottom of a clear glass bowl. Plant a small succulent or air plant (both are easy to keep alive). Arrange sea glass pieces around the plants as decorative ground cover. Add miniature figurines if kids want a fairy garden version - small driftwood pieces make good logs, sea glass becomes stepping stones in the tiny scene.
This is a low-pressure project because there's no permanent commitment - kids can rearrange the glass pieces any time, add new pieces, swap out plants. It keeps living long after the beach trip.
10. Wire-Wrapped Sea Glass Pendants (For Older Kids)
Age range: 10 and up
Materials: Thin copper or silver craft wire (20-22 gauge), sea glass pieces, chain or cord
Time: 30-60 minutes per pendant
Wire wrapping is a real jewelry-making technique that kids can learn with a bit of patience. The idea is to wrap wire repeatedly around a piece of sea glass, securing it tightly enough to hang from a chain without glue or drilling.
Start by cutting about 18 inches of wire. Find the center point and bend it around the top of the sea glass piece. Twist the two ends together a few times above the glass to anchor it. Then wrap each end of wire in opposite directions around the body of the glass - crisscrossing is fine. When you've wrapped several times, twist both ends together at the top again, form a loop for the chain to pass through, and tuck the sharp wire ends under wrapped sections using needle-nose pliers.
The result isn't always perfect the first time - that's fine. Wire is cheap and sea glass is forgiving. After a few tries, kids start to develop a real feel for it. The finished pendants are genuinely wearable, and making jewelry from something you found yourself at the beach carries a satisfying story. Check out our sea glass jewelry guide for more techniques including resin settings.
Tips for Getting the Most Out of Sea Glass Crafts
Sort Before You Start
Spend a few minutes sorting sea glass by color and size before beginning a project. Knowing what you have - six small green pieces, two larger whites, one rare blue - helps kids plan their design rather than grabbing randomly. A muffin tin or egg carton works perfectly as a sorting tray.
Build a Stash Over Time
Most of these projects work better with more glass than less. If you only have a few pieces from one trip, that's fine for a sensory jar or a small pendant. But for mosaics and stepping stones, you want quantity. Keep a collection jar going and add to it over multiple trips rather than trying to craft with whatever you found on a single afternoon. Learn where and how to find the most sea glass to build your supply faster.
Supplement with Craft Glass
Tumbled glass sold at craft stores (labeled as "sea glass" or "beach glass" or "mosaic glass") can supplement your real collection for projects that need a lot of material. It doesn't have the natural variation and character of real sea glass, but it gets the job done for large areas. Use your real collected pieces in the focal spots where they'll be noticed, and fill in with craft glass elsewhere.
Document the Trip
Take a photo of the glass spread out before starting any project - just a flat lay on a white background or a light surface. This creates a before-and-after record: the raw glass on the beach, and the finished craft later. Kids love this kind of documentation, and it creates a memory of the process, not just the product.
Making It Part of the Collecting Habit
The best sea glass trips start with the end project in mind. If kids know they're collecting to make a wind chime, they'll look for pieces with interesting shapes. If they want to make garden markers, they'll keep an eye out for large flat pieces. Having a project in mind changes how they search the beach - suddenly size, shape, and color all matter in specific ways.
This is also a good way to build interest in rare sea glass colors. When a kid knows that red or orange glass is very unusual and would be the centerpiece of their pendant, they pay close attention to every piece they pick up. The rarity chart stops being an abstract fact and becomes a practical guide to finding something special.
If your family is new to collecting, read through our beginner's guide to sea glass collecting for the basics on where to look, what times are best, and what to bring. For families who want to find specific colors for specific projects, our sea glass color rarity chart shows which colors are easiest to find and which will take years of patient searching.
Frequently Asked Questions
What glue works best for sea glass crafts?
For most sea glass crafts, E6000 craft adhesive gives the strongest bond on glass and holds up over time. For kids working on paper or cardboard projects, a hot glue gun (with adult supervision) works well and dries quickly. Clear-drying Mod Podge works for mosaic projects where you want a protective finish over the top. Avoid regular school glue - it doesn't bond well to the smooth surface of sea glass and will let pieces fall off once the project dries.
Do you need to clean sea glass before using it in crafts?
Yes - rinse sea glass in clean water and let it dry completely before using it in crafts. This removes salt, sand, and debris that can prevent glue from bonding properly. For light-colored glass, you can soak it briefly in white vinegar and then rinse to remove any mineral film and bring out the color. Make sure pieces are fully dry before gluing, as trapped moisture can weaken adhesive bonds over time.
Can you use craft sea glass instead of real beach sea glass?
Yes, for craft purposes tumbled craft glass works fine and gives you more color variety. The main difference is that real sea glass has a natural frosted texture from years of ocean tumbling, while craft glass is more uniform. Real sea glass also has sentimental value if you collected it yourself. For kids crafts, mixing real and craft glass is a practical way to stretch your supply while still keeping those special beach finds.
What age is sea glass crafting appropriate for?
Most sea glass crafts are suitable for children ages 5 and up with adult supervision, particularly for any steps involving hot glue, wire, or sharp tools. Simpler projects like sensory jars, sun catchers using contact paper, and mosaic art on paper are very accessible for children as young as 3-4 with hands-on help. The collecting itself is enjoyable for all ages - the beach is the first part of the craft project.